Connecting your computer to a monitor using HDMI can feel like a puzzle, especially when you have a motherboard without integrated graphics. You might be scratching your head, wondering why your screen just won’t light up. Don’t sweat it! Knowing how to enable motherboard HDMI without integrated graphics isn’t as tricky as it sounds. In fact, millions of gamers and tech enthusiasts face this same challenge every day.
The good news? With a few simple steps, you can get that HDMI up and running in no time. Imagine kicking back, streaming your favorite show, or playing the latest game in stunning clarity. All it takes is some insider knowledge, and you’ll be set. Let’s break it down and make it super easy for you!
What is HDMI?
HDMI stands for High-Definition Multimedia Interface. Sounds fancy, right? But it’s pretty simple. HDMI is a widely used way to connect devices, like your computer to your TV or monitor. Instead of dealing with a bunch of cables for video and audio, HDMI sends everything through one cable. How cool is that?
This means you can enjoy crystal-clear visuals and awesome sound without the hassle. Whether you’re gaming late at night, binge-watching your favorite series, or giving a big presentation at work, HDMI has your back. It makes your setup look neat and tidy while delivering top-notch quality. Plus, it supports high-definition video, which means you’ll see every detail—no pixelation here! So, if you want to level up your viewing experience, knowing about HDMI is a must. It’s the go-to choice for anyone wanting the best picture and sound quality.
Integrated Graphics vs. Dedicated Graphics
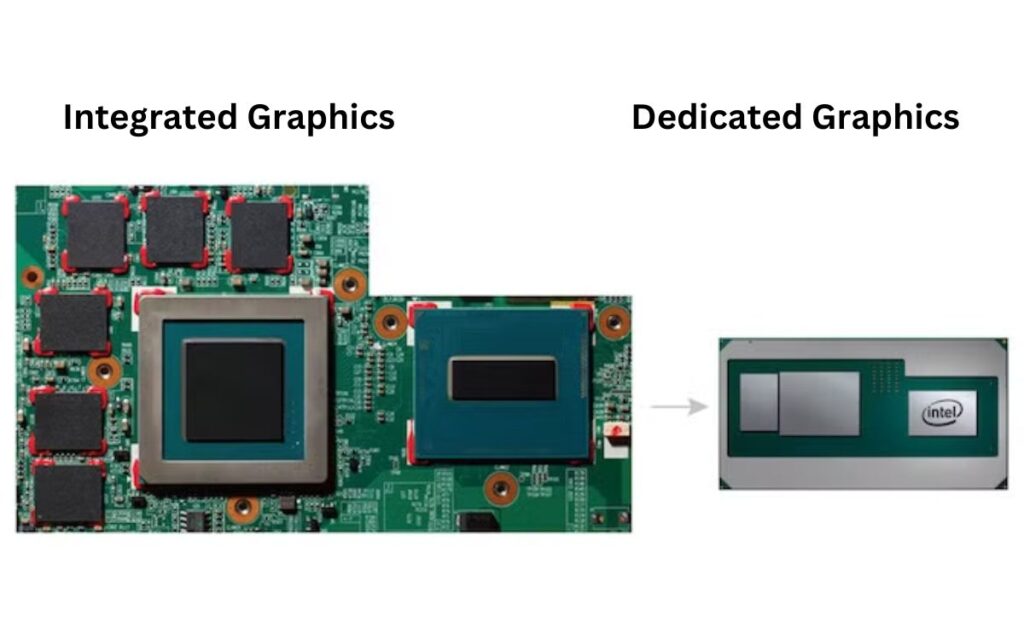
When it comes to graphics, you’ve got two main players: integrated graphics and dedicated graphics. Let’s break it down.
Integrated graphics are built right into your computer’s motherboard. Think of them like the all-in-one deal. They handle basic tasks, like showing videos or browsing the web, without needing any extra hardware. This is perfect for folks who just want to do everyday stuff—watch movies, surf social media, or work on documents. Integrated graphics are cost-effective and energy-efficient, making them a great choice for budget-friendly laptops and desktops.
On the flip side, we have dedicated graphics. This is where the real fun begins! A dedicated graphics card is a separate piece of hardware that you install in your computer. These bad boys pack way more power. They’re designed for serious gamers, graphic designers, and anyone who needs top-notch visuals. If you’re into gaming, dedicated graphics will give you smoother gameplay and better graphics quality. You can crank up the settings and enjoy stunning detail without lag.
In short, if you’re just doing casual browsing or streaming, integrated graphics will get the job done. But if you want to game hard or create stunning visuals, dedicated graphics are the way to go. So, choose your fighter based on what you need—each has its perks.
Why You Might Not Have Integrated Graphics
First off, not all motherboards come with this feature. Many newer boards skip integrated graphics altogether. This is especially true for high-performance setups meant for serious gaming or graphic design. Manufacturers often focus on making them more powerful, and that means pushing for dedicated graphics cards instead.
Another reason could be that you’re using an older motherboard. If you’ve got an older model, it might just not have that built-in capability. Some folks also choose to save a few bucks and go for a board without integrated graphics, especially if they already have a solid graphics card. It’s all about your needs and what you plan to do with your computer.
Not having integrated graphics isn’t a deal-breaker. It just means you’ll rely on a dedicated GPU for all your video output. And let’s be honest—dedicated graphics cards usually give you better performance and smoother gameplay. So, while you might miss out on integrated graphics, you’re not missing out on quality.
Also Read this: Do all CPU fans fit all motherboards?
The Importance of Enabling HDMI Output
Enhancing Your Viewing Experience
Getting your HDMI up and running is super important for enjoying high-quality video and audio. When you connect your computer to a monitor or TV with HDMI, you’re in for a treat! Whether you’re gaming, streaming movies, or even working on a big project, having that HDMI connection makes a world of difference. You’ll see sharper images and hear crisp sound. It’s like going from black-and-white TV to full-blown HD. You won’t just be watching; you’ll be immersed in the action!
Think about it—when you’re playing your favorite game, you want to see every detail. You want the colors to pop and the sound to surround you. HDMI does all that. It makes everything clearer, sharper, and way more enjoyable. Plus, you can easily switch between different devices, so you can go from gaming to binge-watching your favorite series in a snap. Who doesn’t love that convenience?
Professional Use Cases
Now, if you’re working in fields like graphic design, video editing, or gaming, having HDMI capability is a game-changer. For designers and video editors, every pixel counts. You need a setup that shows your work in the best light. HDMI allows for smooth displays and high resolutions, which means you can see your designs or video edits just like they’re meant to be seen. This clarity helps you make better choices when you’re working on your projects.
And let’s not forget gamers! Having HDMI means you can play with stunning graphics and fast response times. It keeps everything running smoothly, so you’re not left lagging behind in a heated match. Plus, you can easily connect to larger screens or even multiple monitors, giving you a serious edge in both work and play. So, enabling HDMI isn’t just a nice-to-have—it’s essential for getting the most out of your tech, whether you’re chilling at home or working hard in your career.
Pre-requisites for Enabling HDMI
Before you dive into enabling HDMI on your setup, it’s important to make sure you have everything you need. Let’s break it down so you know what to look for.
Hardware Requirements
- Dedicated Graphics Card: First things first—make sure your PC has a dedicated GPU (Graphics Processing Unit) installed. This is key because integrated graphics won’t help you here. If you’ve got a powerful graphics card, you’re already on the right track!
- HDMI Cable: Next up, you’ll need a good quality HDMI cable. Don’t grab just any old cable from the drawer. A solid HDMI cable is essential for the best performance. It’s like using a quality brush for painting; it makes a big difference in the final result. Look for cables that support high-definition video to ensure you get the clearest picture.
- Monitor or TV with HDMI Input: Finally, check your monitor or TV. Does it have an HDMI input? If you’re planning to connect to a screen, it needs to support HDMI. Most modern displays do, but it’s always smart to double-check before you start plugging things in.
Software Requirements
Now that you’ve got the hardware sorted, let’s talk software. You need to have the latest drivers for your graphics card installed. Think of drivers as the bridge between your computer and your hardware. If they’re outdated, your HDMI output might not work properly. To keep everything running smoothly, head over to your GPU manufacturer’s website and download the latest drivers. This step is crucial for getting that HDMI connection up and running without a hitch.
Safety Precautions
Before you start opening up your computer, safety comes first! Make sure to power it down and unplug it. This is super important to avoid any accidents while you’re working. If you don’t unplug it, you could run into some serious issues, like electric shocks or damaging your components. It’s always better to be safe than sorry!
By checking off these prerequisites, you’ll set yourself up for success in enabling HDMI. Once everything’s in place, you’ll be ready to enjoy a fantastic viewing experience!
Also Read this: Does Motherboard Affect FPS?
So, how to enable motherboard hdmi without integrated graphics
Ready to get that HDMI working? Let’s walk through the steps together so you can enjoy great video and sound. Just follow along, and you’ll be set in no time!
Step 1: Check Your Hardware Setup
First things first—let’s make sure your dedicated graphics card is installed correctly. Here’s how to do it:
- Open Your PC Case: Before you start, power down your computer and unplug it. You don’t want any surprises! When you’re ready, carefully open your PC case. If you’ve never done this before, don’t worry. Just follow the instructions in your motherboard manual.
- Ground Yourself: Make sure you’re grounded to avoid static shock. You can do this by touching a metal part of the case or using an anti-static wrist strap if you have one. This step helps protect your components.
- Locate the GPU: Once you’ve got the case open, find your graphics card. It should be plugged into a PCIe slot on the motherboard. Take a moment to check that it’s securely seated. If it’s loose, push it down gently until it clicks into place.
- Connect Power Cables: If your graphics card needs extra power, look for any cables that need to be plugged in. Make sure those are connected too! A secure connection here is crucial for performance.
Step 2: Accessing the BIOS
Now that your hardware is set up, let’s access the BIOS to make sure your system recognizes the GPU:
- Restart Your Computer: Once everything looks good, turn your computer back on.
- Press the BIOS Key: When your computer starts up, you need to press the BIOS key right away. This key is usually Delete, F2, or Esc, but it can vary by manufacturer. If you’re unsure, check your motherboard manual for specifics.
Step 3: Adjusting BIOS Settings
Once you’re in the BIOS, it’s time to make a few adjustments:
- Navigate to Advanced Settings: Use the arrow keys on your keyboard to find the Advanced Settings menu. Look for options related to graphics or display settings.
- Set Primary Display: Find the setting for the primary display and make sure it’s set to your dedicated graphics card. This tells your computer to use the GPU instead of any integrated graphics that might be available.
Step 4: Installing the Latest Drivers
With your BIOS settings adjusted, the next step is to install the latest drivers for your graphics card:
- Go to the Manufacturer’s Website: Head over to the website for your GPU brand, like NVIDIA or AMD. They usually have a section dedicated to drivers.
- Download and Install the Latest Drivers: Look for the latest drivers for your specific graphics card model. Download them and follow the prompts to install. This step is super important for making sure your HDMI output works correctly.
Step 5: Connecting the HDMI Cable
Now it’s time to connect your HDMI cable:
- Plug One End into the GPU: Take your HDMI cable and plug one end into the HDMI port on your graphics card. This is usually located on the back of your PC.
- Connect the Other End to Your Monitor or TV: Now, plug the other end of the HDMI cable into your monitor or TV. Make sure it’s secure!
Step 6: Configuring Display Settings in the Operating System
Finally, let’s configure your display settings so your operating system recognizes the HDMI output:
- For Windows:
- Right-click on the Desktop: This opens a menu where you can find various options.
- Select Display Settings: Click on this to open the display options.
- Choose the Display: Here, you can see if your monitor is recognized. If you’re using multiple displays, you can arrange them as you like.
- For macOS:
- Go to System Preferences: You can find this in the Apple menu.
- Select Displays: This will show you the display settings.
- Configure Your Display Settings: Adjust the resolution and arrangement to your liking.
And that’s it! You’re all set to enjoy your HDMI connection. With these steps, you can have high-quality video and sound, making your viewing experience top-notch. If you run into any bumps along the way, don’t hesitate to reach out for help!
Also Read this: What is AAFP on Motherboard?
Troubleshooting Common Issues
Sometimes things don’t go as planned, and that’s okay! If you run into problems while trying to get your HDMI output working, here are some common issues and how to fix them. Don’t stress—most of these can be solved with just a few simple steps.
No Signal on Monitor
One of the most frustrating problems is getting a “No Signal” message on your monitor. Here’s what you can do:
- Check Connections: First, make sure your HDMI cable is securely connected at both ends. Sometimes, it can look like it’s plugged in, but it’s not seated right. Pull it out and plug it back in to be sure.
- Switch HDMI Ports: If your graphics card has multiple HDMI ports, try using a different one. Sometimes, one port might be acting up while the others work just fine.
- Test Another Cable: If you’ve got another HDMI cable lying around, give it a shot. Some cables can be faulty and might not transmit the signal properly.
- Restart Your Computer: A quick restart can do wonders! Sometimes, your computer just needs a little nudge to recognize the new setup.
- Select the Right Input on Your Monitor: Make sure your monitor is set to the right input. If you have multiple devices connected, like a game console or DVD player, your monitor might not be showing the HDMI input. Use the remote or buttons on the monitor to switch to the correct HDMI source.
Audio Not Working
You’ve got video, but no sound? Let’s figure this out:
- Check Audio Output Settings: Right-click on the sound icon in your taskbar (the bottom right corner of your screen). Select “Playback Devices.” Make sure your HDMI device is set as the default. This tells your computer to send audio through the HDMI connection instead of other outputs.
- Test the Volume Levels: It sounds simple, but sometimes the volume can be turned down or muted. Make sure both your computer and your monitor/TV are turned up.
- Restart the Audio Device: If your monitor or TV has its own speakers, try restarting it. Unplug it, wait a few seconds, then plug it back in. This can reset any minor issues.
- Check for Software Updates: Ensure your operating system is up to date. Sometimes, updates fix bugs that might be causing audio issues.
Inconsistent Display Resolution
If your display doesn’t look right—maybe everything’s blurry or stretched—here’s how to fix it:
- Adjust Display Settings: Right-click on your desktop and select “Display Settings.” From here, you can change the resolution. Choose the recommended resolution for your monitor to get the best picture.
- Update Graphics Drivers: If you haven’t updated your graphics drivers in a while, it’s time to do so. Head to the GPU manufacturer’s website and download the latest drivers. New drivers often fix display issues.
- Check Monitor Settings: Some monitors have their own settings that can affect resolution. Use the buttons on your monitor to navigate through its menu and make sure the settings are correct.
- Try a Different HDMI Port on Your Monitor: If your monitor has multiple HDMI ports, switch to another one. Sometimes, certain ports can have issues while others work perfectly.
If you still can’t get things working after trying these tips, don’t hesitate to reach out for help. Online forums and tech support can be lifesavers when you’re in a jam. Remember, troubleshooting is just part of the tech journey, and with a bit of patience, you’ll get that HDMI output working like a charm!
Advanced Tips and Tricks
Now that you know how to get your HDMI up and running, let’s dive into some advanced tips and tricks. These can help you get even more out of your setup and solve any pesky problems that might pop up.
Using HDMI Splitters or Adapters
If you’re looking to connect multiple displays, HDMI splitters can be a real lifesaver. These handy little devices let you duplicate or extend your screen across two or more monitors. Imagine playing a game on one screen while checking out a guide or streaming a video on another. Pretty cool, right?
But before you rush out to buy an HDMI splitter, there are a couple of things to keep in mind:
- Check Compatibility: Not all splitters work with every graphics card. Make sure your GPU can handle multiple outputs. Most modern cards can, but it’s always good to double-check.
- Know Your Limits: If you’re duplicating your screen, both monitors will show the same image. If you’re extending your display, each monitor will act like a separate screen. This is awesome for multitasking but remember that not all GPUs can support more than two displays at once.
Alternative Connection Options
If your HDMI isn’t working or if you just want to try something different, consider other connection types. DisplayPort and DVI are two solid alternatives that can provide similar quality.
- DisplayPort: This is great for high resolutions and refresh rates. If you’re gaming or doing graphic design, DisplayPort can offer excellent performance. Many modern monitors come with DisplayPort, so it’s worth checking if yours does.
- DVI: While a bit older, DVI can still deliver a good video signal. It doesn’t carry audio like HDMI, so you’ll need a separate audio connection if you go this route. It’s useful for connecting to older monitors or projectors that don’t have HDMI inputs.
- Adapters: If your monitor or TV only has HDMI and your graphics card has DisplayPort or DVI, don’t worry! You can use adapters to make the connection work. Just make sure you get a quality adapter to avoid any signal issues.
Keeping Your System Updated
One of the best ways to keep your HDMI and other connections running smoothly is to stay on top of updates. Here’s how:
- Update Graphics Drivers: Graphics card manufacturers regularly release driver updates to fix bugs and improve performance. Check the manufacturer’s website every few months or set a reminder to keep your drivers fresh. This helps prevent compatibility issues with games and applications.
- Update Your Operating System: Keeping your OS up to date is just as important. Updates can include crucial fixes and new features that improve how your system handles connections like HDMI.
- Check for Monitor Firmware Updates: Some monitors also have firmware updates available. These updates can enhance performance or fix issues, so it’s worth looking into if you’re having trouble.
By following these advanced tips and tricks, you can get the most out of your HDMI setup and keep everything running smoothly.
FAQs
Can I enable HDMI if my motherboard doesn’t have integrated graphics?
Yes, you can! As long as you have a dedicated graphics card installed, you can enable HDMI output. Just adjust your BIOS settings and make sure you have the latest drivers for your graphics card. It’s really all about making that connection work, so you can enjoy high-quality video and sound.
What do I do if my HDMI isn’t working?
If your HDMI isn’t working, don’t panic! Start by checking your connections. Make sure the HDMI cable is plugged in securely at both ends. Next, check that your graphics drivers are up to date—outdated drivers can cause issues. Finally, verify your display settings in your operating system. Sometimes, it’s just a matter of selecting the right input or adjusting the resolution.
Is it safe to open my PC case to check the GPU?
Yep, it’s safe to open your PC case, but remember to turn off and unplug your computer first. This helps avoid any electrical issues or accidental shocks. When you’re inside, make sure to ground yourself by touching a metal part of the case to prevent static electricity from damaging your components.
Can I use an HDMI splitter with my setup?
Absolutely! An HDMI splitter is a great tool if you want to connect multiple displays to your graphics card. It allows you to either duplicate your screen—showing the same image on both monitors—or extend your display, giving you more screen space. Just be sure to check if your graphics card supports multiple outputs and that you get a good quality splitter.
What if my monitor doesn’t have an HDMI port?
If your monitor doesn’t have an HDMI port, don’t worry! You can use an adapter. For example, if your monitor has a DVI or VGA port, you can find adapters that convert HDMI to those formats. Just keep in mind that DVI may not carry audio, so you might need a separate audio connection if you go that route.
Can I connect my laptop to a monitor using HDMI?
For sure! If your laptop has an HDMI port, you can easily connect it to an external monitor or TV. Just plug one end of the HDMI cable into your laptop and the other into the monitor. Then, select the right input on your monitor, and you’re good to go!
7. How can I improve the quality of my HDMI connection?
To get the best quality from your HDMI connection, start with a high-quality HDMI cable. Avoid cheap cables that might not carry the signal well. Also, keep your cables as straight as possible and avoid sharp bends, which can damage them. Finally, make sure your graphics drivers and monitor settings are set to the highest resolution supported by your setup.
What should I do if I see a “No Signal” message on my monitor?
Seeing a “No Signal” message can be frustrating, but it’s usually easy to fix. First, double-check all your connections to ensure everything is plugged in correctly. Then, try switching the HDMI cable to another port on your graphics card or monitor. If that doesn’t work, restart your computer and check your display settings to ensure the right monitor is selected.
Can I use HDMI for gaming on multiple monitors?
Yes, you can! Using HDMI for gaming on multiple monitors is a great way to enhance your experience. Just make sure your graphics card can support multiple displays and that you have the right cables. You can use HDMI splitters or adapters if needed. Setting up multiple screens lets you multitask and gives you a wider field of view in games.
Conclusion
So, you’ve come to the end of this HDMI journey. Enabling HDMI output on a motherboard without integrated graphics might seem like a challenge at first, but it’s really not as tough as it sounds. Think of it like piecing together a puzzle. Each step is a crucial part of the picture, and once everything clicks into place, you’ll be amazed at what you can achieve.
By checking your hardware, you’ve made sure your graphics card is ready to go. Adjusting those BIOS settings? That’s like flipping the switch to get the lights on in a dark room. And updating your drivers? That’s the final touch that ensures everything runs smoothly. Now, you’re all set to enjoy high-quality audio and video on your monitor or TV. Imagine kicking back after a long day, diving into your favorite game or streaming that series everyone’s been talking about—all in stunning clarity.
Remember, not having integrated graphics isn’t a roadblock; it’s just a part of your unique setup. Embrace it! With the right steps, you’ve unlocked a whole new level of enjoyment. So, don’t wait any longer. Get started today! The world of crisp visuals and booming sound is waiting for you, and it’s time to jump right in.